Notifications
You can configure optional Notification emails that are sent when a form is submitted.
Admin Notifications
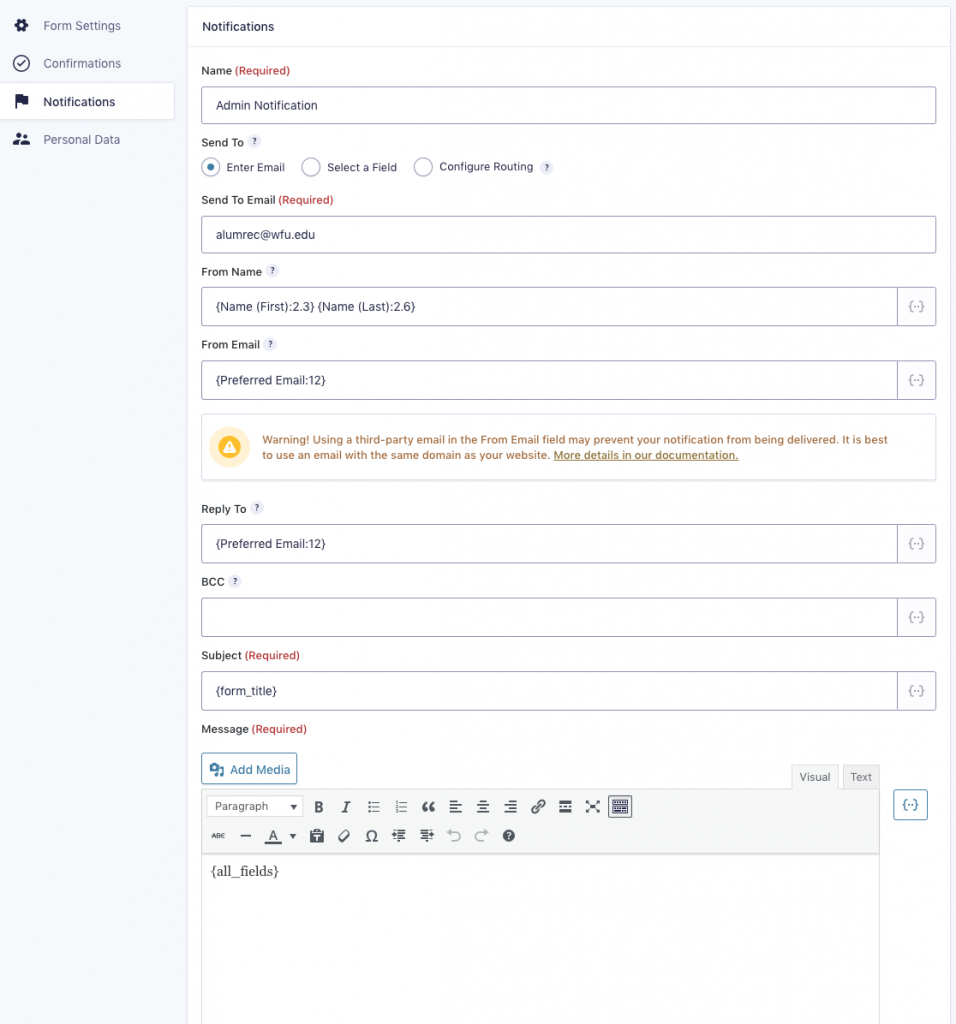
The Admin Notification option allows you to configure an email that is automatically sent to you or another member of your team when a form is submitted.
- To create an admin notification, click Forms in the WordPress sidebar and click on your form to edit it.
- Hover over Settings in the menu and select Notifications.
- Click Add New or edit the default Admin Notification.
- Enter your email address (or a team member’s) as the Send to Email.
- Set the from name using the small dropdown menu to the right of the field. Select the field or fields that will display the user’s name.
- For the From Email, use the small dropdown to select the submitted email field.
- Fill out the Subject and Message fields below as shown.
- Click Save Notification.

User Notifications
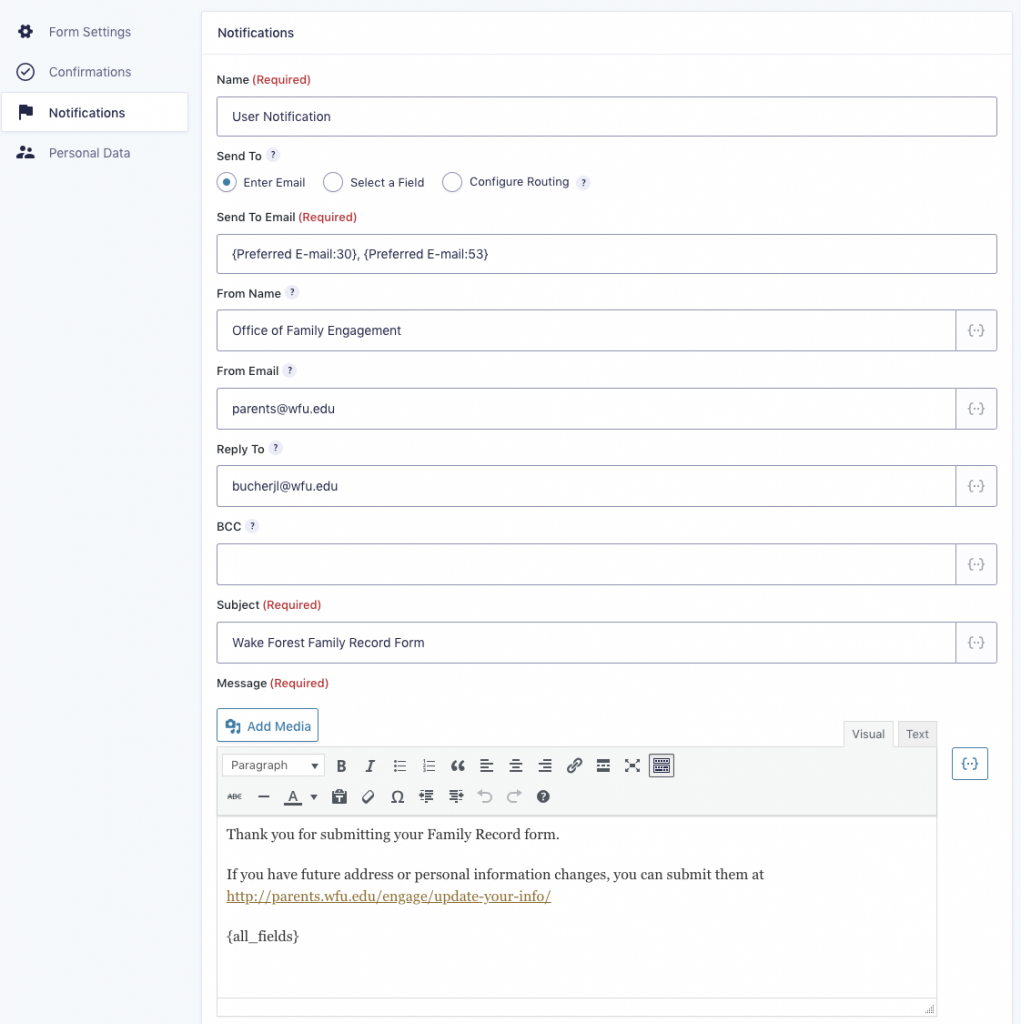
The User Notification option allows you to automatically send an instant, one-time auto-responder message to the user submitting the form.
- To create a user notification, click Forms in the WordPress sidebar and click on your form to edit it.
- Hover over Settings in the menu and select Notifications.
- Click Add New or Edit an existing Notification.
- Name it User Notification.
- In the Send To field choose the “Select a Field” radio button and choose the “Email” field from the dropdown
- Fill out the fields as noted below. In the small dropdowns on the right, you can enter dynamic information from the form to customize the notification.

Special Note
If your form has a document upload field DO NOT check the “Attach uploaded file to notification” box next to Attachments for your notifications. Using {all_fields} or choosing the document from the dynamic fields in the dropdown will provide a link to the document. The “Attach uploaded file to notification” option causes a conflict with Wake Forest’s email handling system and will generate an error when the user tries to complete your form.

