

Categories
Categories provide a helpful way to group related blog posts together and quickly tell readers what a post is about. They also make it easier for people to find your content.
Categories can be displayed on some of the post blocks, below the post preview on your blog landing page, and in the blog sidebar dropdown. You can assign multiple categories per post, but you must assign at least one.
Adding Categories within a Post
You can assign and/or add new categories to posts before you publish them using the Categories area to the right of the post editor. Select the checkbox next to a category name(s) to associate it with a post.

If you would like to add a new category to your blog and associate it with the post, click Add New Category. If you use more than one Category you can set the primary category in the drop-down below.
Adding Categories via Your Dashboard
You can also add new categories and manage existing categories from Posts > Categories in your dashboard.

You will be presented with a list of your existing categories and an option to add new categories. You can add a new category by filling out the fields:
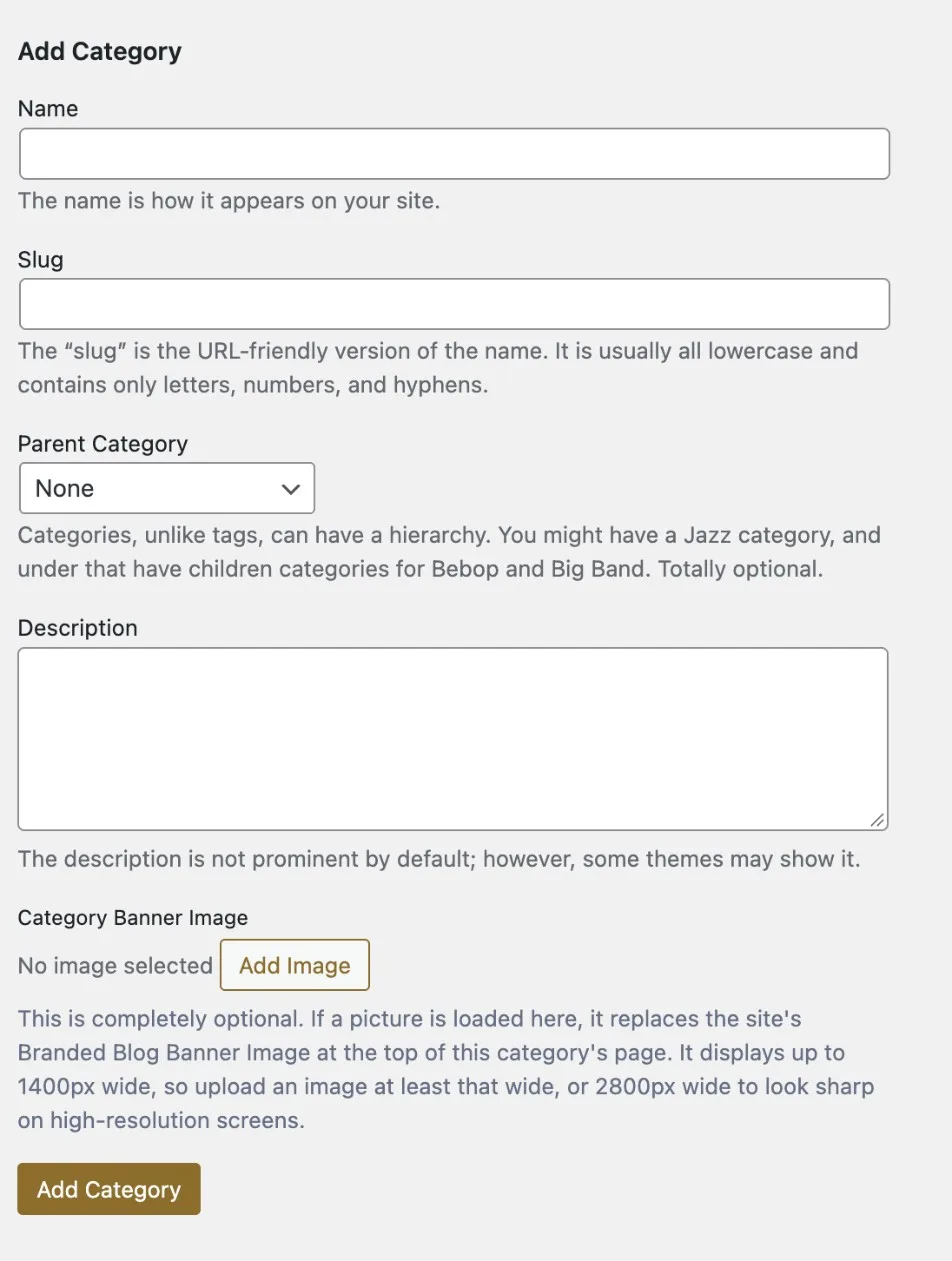
Name: As expected, the name of your category.
Slug: Will be automatically generated based on the name.
Parent: If you want to nest a category within a category, select the parent category. Otherwise, leave at none.
Description: Describe what the category is for. This description will appear as a tooltip if you use the category widget, and at the top of the category’s page if your site has turned on category descriptions in Blog Options. (Optional)
Category Banner Image: An image to show at the top of this category’s page in place of your site’s Branded Blog Banner Image. It displays up to 1400px wide, so upload an image at least that wide, or 2800px wide to look sharp on high-resolution screens. (Optional)
Click Add New Category to add new details to the list.
Managing Categories
The Posts > Categories page in your dashboard displays all your categories and shows the name, description and number of posts belonging to each category. If you move your mouse over a category, a set of options will appear, allowing you to edit, quick-edit or delete that category:

If you click on Edit, you will be taken to a separate page where you can edit the name, parent, description and banner image. This functions exactly the same as adding a category.
Clicking on Delete will delete that category.
Category Page Banner and Description
Each category has its own page that lists its posts, at an address like yoursite.wfu.edu/category/news/. You can give that page its own banner image and a short introduction.
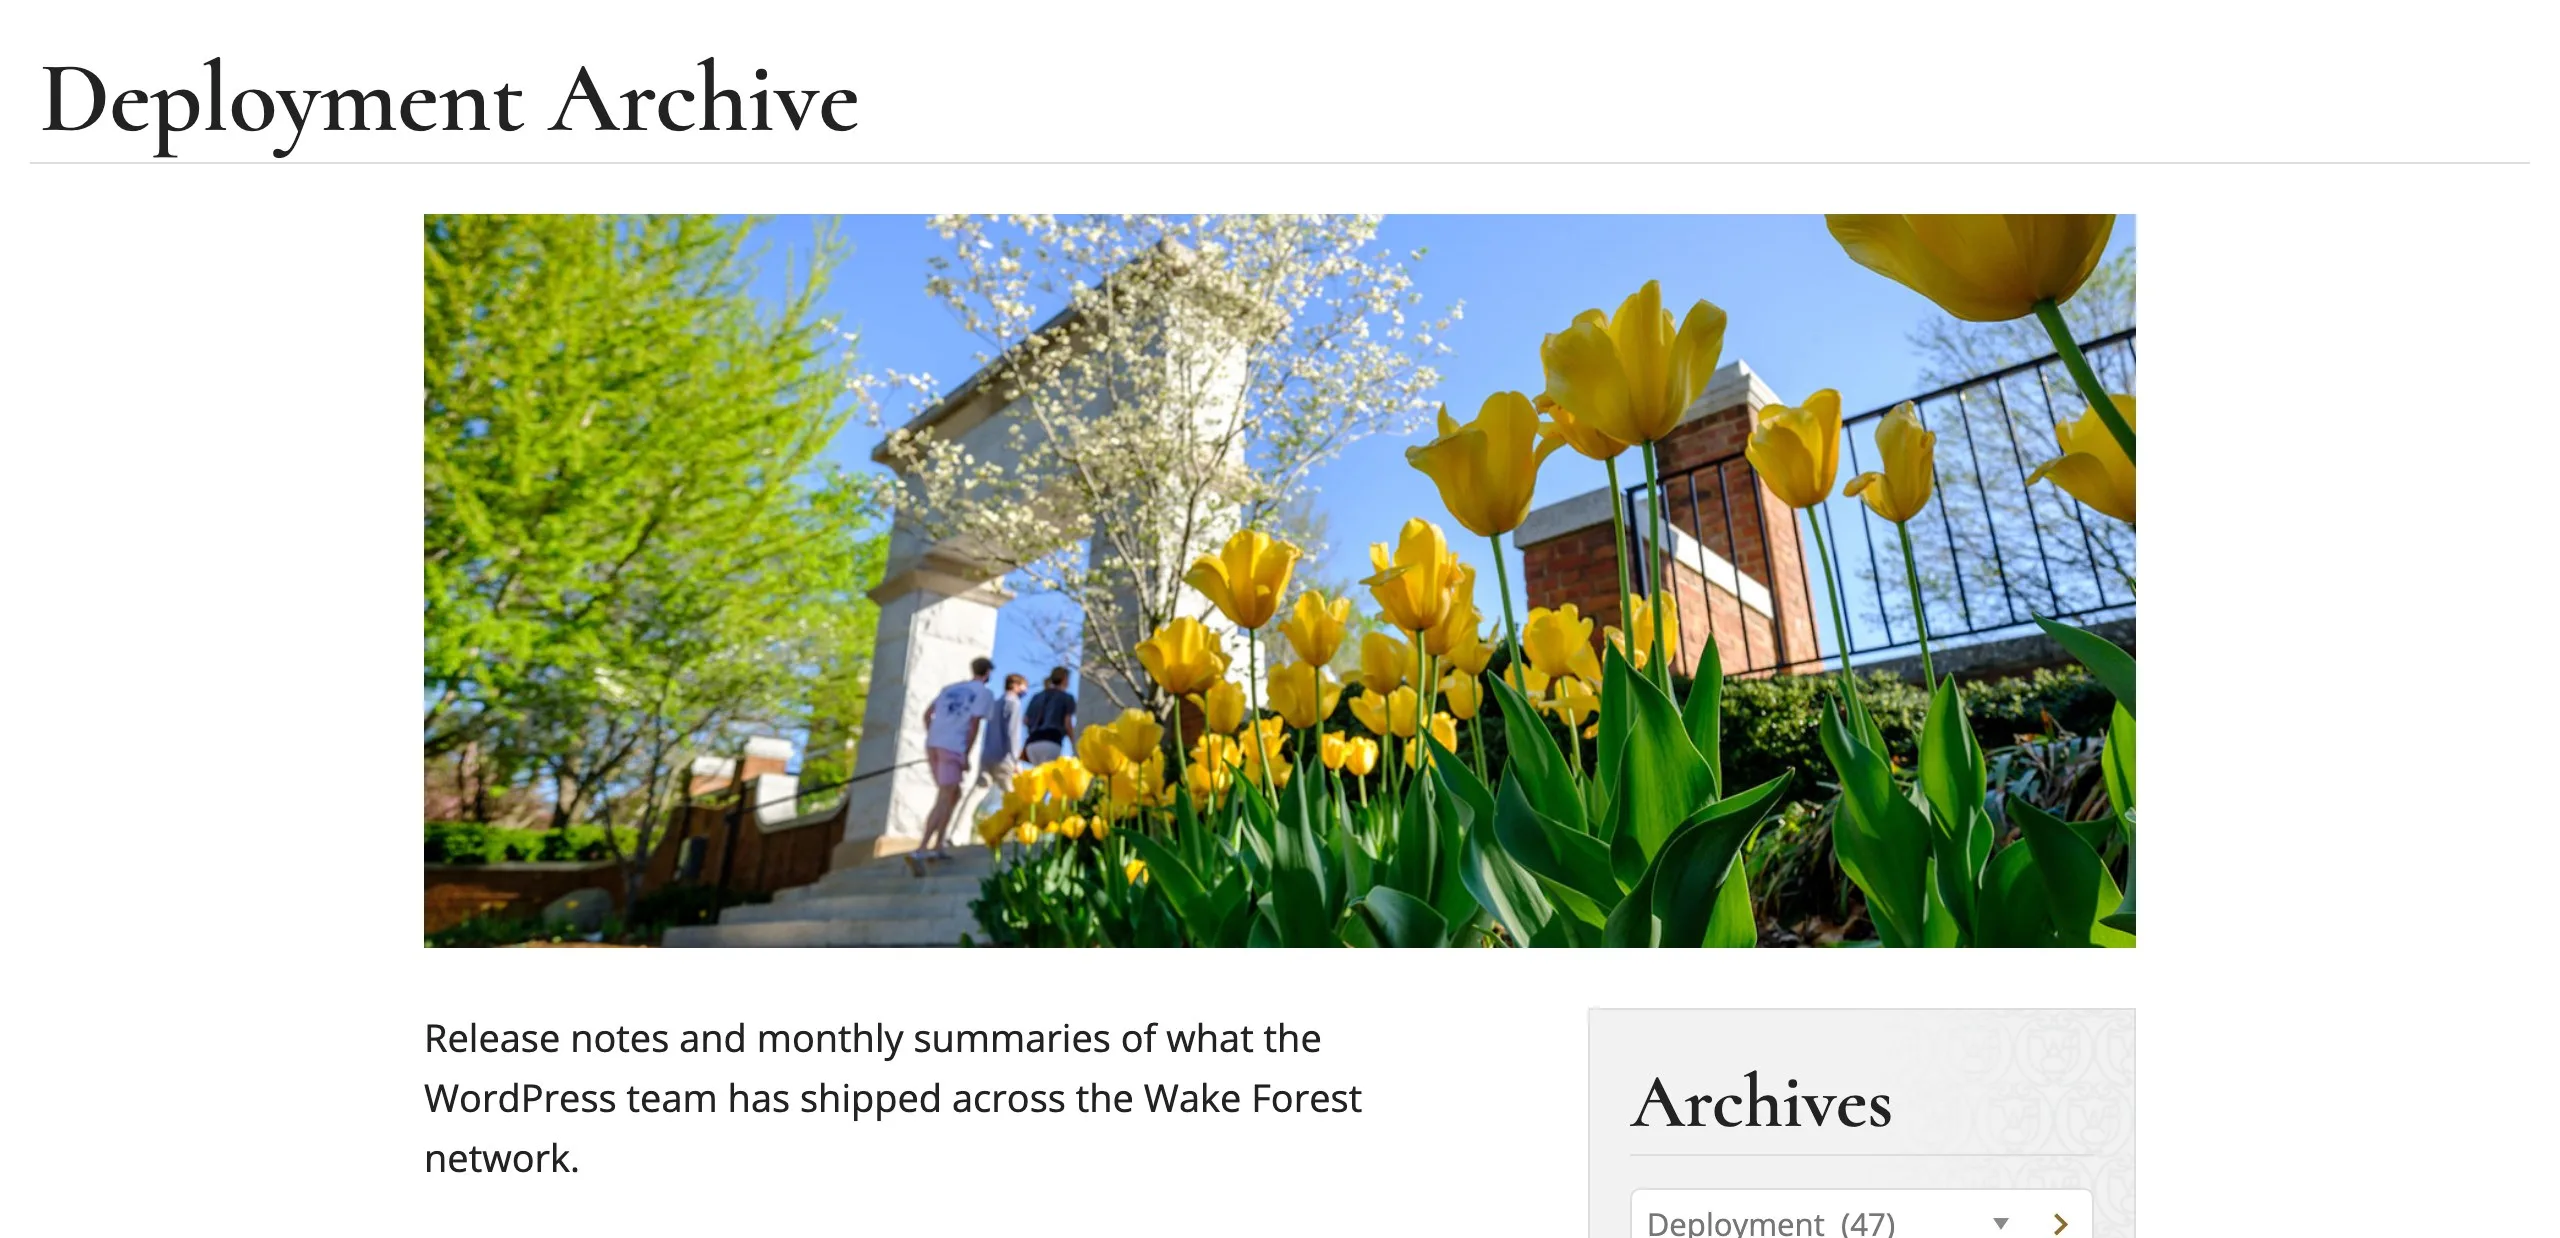
To add a banner, edit the category and choose an image under Category Banner Image. Categories without their own image keep using your site’s Branded Blog Banner Image.
To show a category’s description above its posts, turn on Show/hide category description on category pages in Blog Options. The setting applies to every category on your site, but only categories that have a description will show one.
NOTE: Before turning descriptions on, look over the Description column on Posts > Categories. Descriptions saved in the past will start appearing on your site, so update or remove any that are out of date.
Setting the Default Category
A default category (“uncategorized”) will be assigned to published posts if you don’t specify one. The name of the default category can be changed under Settings > Writing in your dashboard.
Deleting a Category
When a category is deleted, all posts that were only in that category will be assigned to the default category. If a post was also in other categories, it will remain untouched. Note that you cannot delete the default category.