
Staff List
This block allows you to add one or more staff members to any page. You can build out staff member profiles and then use our block interface to pull them into any page you like.
NOTE: If you want to upgrade to the new grid view your old photos may be too small and will display fuzzy. You can request new versions of existing photography and resize them to 500px x 500px or this may be an opportunity for your team to take new headshots.
The instructions for adding a public profile page have changed slightly since this video was created. See the documentation below for clarification.
Block Settings

Heading Level: Select the correct accessible heading level for your page. If you are unsure about which heading level is correct for your page, visit our Heading tutorial for information.
Add Staff Members By: This allows you to either add staff members by their Name, Role or to Show All staff members.
Staff Roles/Names: If you select to Add Staff Members by Role or Name, you’ll get a repeater that allows you to add one or more roles or names to your staff list block. This option does not appear if you selected Show All.
Display Options: Allows you display staff members as either a List, or a 3 or 4 column grid.
Link to Individual Profile Pages: (Updated 9/5/2024) Enables a “View Bio” button that links to a unique page for any staff members who have a Public Profile. This page will contain all the information included in the staff list page as well an any additional information you’ve added using the Gutenberg editor.
Display Bio: In narrow Grid views, the bio can be lengthy. If you choose not to display Bios, be sure to enable Link to Individual Profile Pages so that the Bio information is available by clicking into the staff member page.
Adding a Staff Member
Before a staff member can be added to the block, it must first be added as a custom post type on the back-end of the website. You can find the Staff custom post type on the left sidebar of the back-end of your site.
Simply click on “Staff” and then “Add New Staff Member“
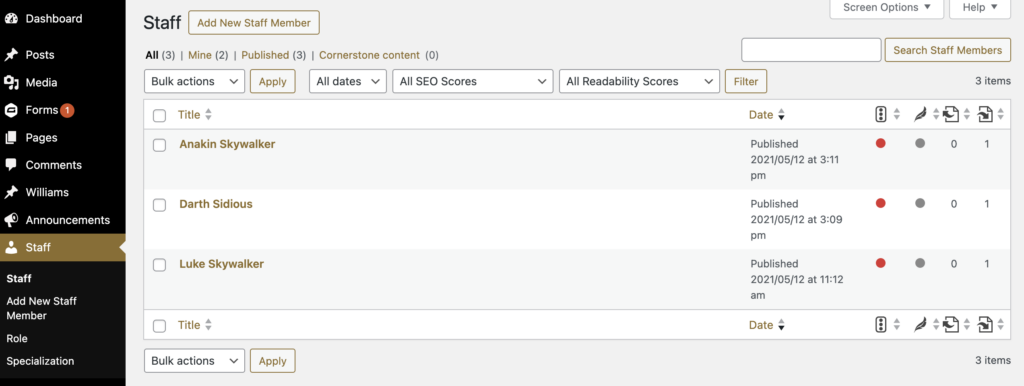
This will take you to the Staff Member Edit page.
Title: The name of the staff member that will appear in the selector.
- First Name: If a middle initial or middle name is important, please include that here.
- Last Name
- Job Title [Optional]: This primary title will appear in bold.
- Additional Titles [Optional]: Useful for endowed titles, directorships, etc.
- Area of Expertise [Optional]: This should be a concise sentence on your area of expertise. It appears on the grid and list view.
- Pronouns [Optional]: The preferred pronouns of the staff member.
- Education [Optional] This is hidden on grid views if Display Bio is set to No. Detailed Education can also be added into the block editor.
- Email [Optional]: This will create a hyperlink on the front-end.
- Personal Website or Other Contact Method [Optional]: This will create a hyperlink on the front-end to a URL (contact form, website, etc.)
- Phone Number [Optional]
- Office Location [Optional]
- Photo [Optional] Recommended image size is 500 x 500 pixels, but the theme will crops your images to a square when you upload it. If you don’t like the result, it’s helpful to crop your image square before uploading.
- CV File Upload [Optional]: Provides a way to include a downloadable CV file. A PDF is the recommended file format.
- Bio [Optional]: This legacy Bio field can be toggled off or on depending on the view. You can also consider adding your detailed Biographical information to the block editor.
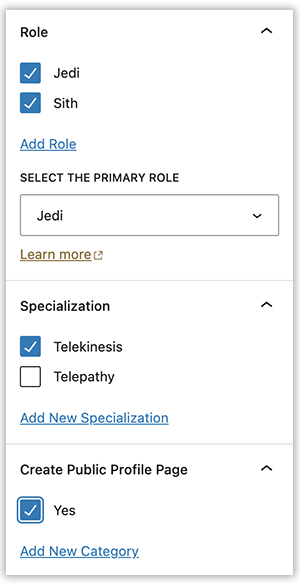
Role: Don’t forget to add your staff member to an existing Role on the right-hand sidebar of the edit page. You can create a new role by clicking on “Add New Role”. This allows you to group staff members by department or other criteria on the front-end. The role is not displayed on the staff pages.
Specialization [Optional]: Any specializations you add will be displayed in the grid and list view as well as the individual staff member page.
Create Public Profile Page: Updated 9/5/2024 Standalone staff pages are no longer created by default . If you’d like a staff member to have a public profile page, click Yes.
Gutenberg Editor: The Staff pages all include a full Gutenberg Editor so any additional information can be added to a Staff Page. Columns, accordions and all bocks are supported in the editor. Visually the Block editor is above the form field, but will display underneath the primary Staff Information.
Once everything has been added, click “Update” to save your staff member and add it to your block.
List View Example

Anakin Skywalker
Lord Vader
Anakin Skywalker was a legendary human male Jedi Knight of the Galactic Republic and the prophesied Chosen One of the Jedi Order, destined to bring balance to the Force. Also known as “Ani” during his childhood, Skywalker earned the moniker “Hero With No Fear” from his accomplishments in the Clone Wars. His alter ego, Darth Vader, the Dark Lord of the Sith, was created when Skywalker turned to the dark side of the Force, pledging his allegiance to the Sith Lord Darth Sidious at the end of the Republic Era.

Darth Sidious
Emperor
Darth Sidious, born Sheev Palpatine and also known simply as the Emperor, was a human male Dark Lord of the Sith and Emperor of the Galactic Empire, ruling from 19 BBY to 4 ABY. Rising to power in the Republic Senate as the senator of Naboo, the secretive Sith Lord cultivated two identities, Sidious and Palpatine, using both to further his political career. He orchestrated the fall of the Galactic Republic and the Jedi Order through the Clone Wars, and then established his reign over the galaxy which lasted until his death at the Battle of Endor. However, the dark side of the Force gave rise to powers which allowed the Emperor to return from the grave.

Luke Skywalker
Jedi Master
Force Ghost Realm
Luke Skywalker, a Force-sensitive human male, was a legendary Jedi Master who fought in the Galactic Civil War during the reign of the Galactic Empire. Along with his companions, Princess Leia Organa and General Han Solo, Skywalker served on the side of the Alliance to Restore the Republic—an organization committed to the downfall of the Galactic Empire and the restoration of democracy. Following the war, Skywalker became a living legend, and was remembered as one of the greatest Jedi in galactic history.
Grid View Example
Luke Skywalker
Jedi Master
Force Ghost Realm
Advanced Search & Filter Example
This form updates results automatically as you select options. Disable live searching
Luke Skywalker
Jedi Master
Force Ghost Realm
When combined with the FacetWP Plugin, Advanced Search and Filtering can be enabled. Submit a support request to ask for FacetWP to be activated on your site if it isn’t already.

Once FacetWP is active, your staff pages will need to be Indexed before they can be filtered properly. You may also need to periodically Re-Index your FacetWP table after making significant changes to your staff list.
The Re-Index button is available under Settings > FacetWP.
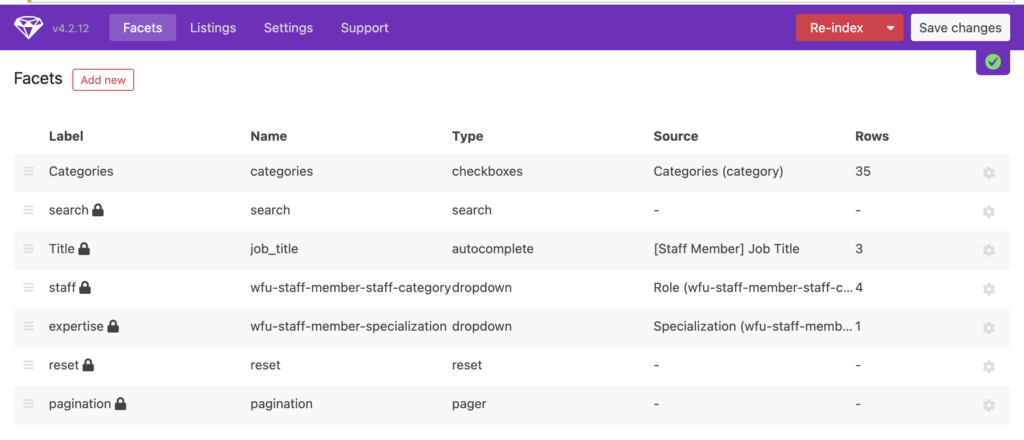
Once Re-indexing is complete, the filtering options will work correctly.