
Image
NOTE: Official Wake Forest photos can be requested using the Wake Forest University Photo Library. To request photos, please follow these instructions.
It is acceptable to use images from sources other than Wake Forest University provided they are properly licensed. This includes paid stock photography, images acquired from professional photographers, or other commercial imagery for which your department has secured usage rights.
Images obtained without explicit permission, such as unlicensed or unauthorized images downloaded from the internet or search results, should not be used.
Other guidance on photography can be found on our Brand Guide.
The image block can be added to a page by clicking on the Add Block button.
Detailed instructions on adding blocks can be found on Building a Page.
Adding an Image
The media options panel will load with the options, Upload and Media Library.
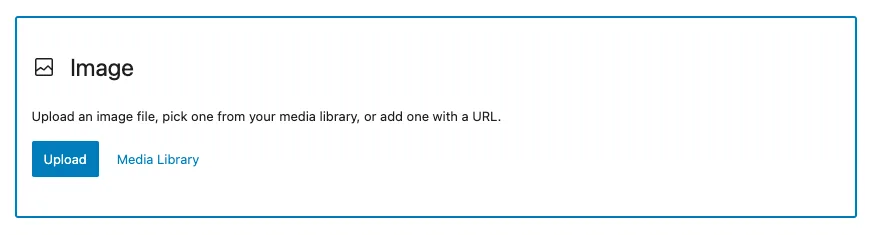
Upload and Media Library will let you add or choose media from your library and embed it in your page. More information about image editing is available on our Photo Editing page.
Resizing Images
Once the image is added to the editor, you can resize and align the images to better fit the surrounding content.
In order to resize an image, click on the image to reveal the draggable resize handles. Then, click on the resize handles and drag the image to your desired size.
Alternatively, on the right hand side in the block settings, the image size can be fine tuned by adjusting width and height dimensions. There are also some convenient options in the block settings for setting the image to 100, 75, 50, and 25% of its original size.
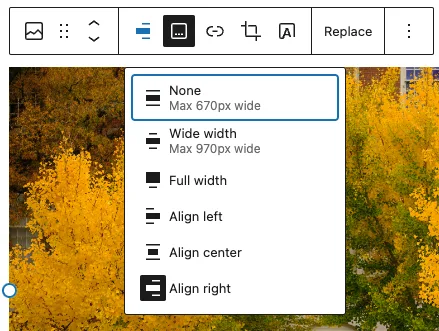
Aligning Images
If you wish to align an image within a paragraph you will first need to insert the image just above the target paragraph block.
From there, click on the image and select left or right alignment, this will merge the image into the paragraph block and the text will float around.
Wide and Full Width Images
Wide and Full-Width images will allow you to expand the image beyond the theme’s usual content width.
Captions

If you wish to add a caption to a singular instance of an image, simply type it in the caption space below the image in the editor.
Link Settings

The link settings allow you to hyperlink your images. You may choose to click on the image to open an attachment page, the original media file, or a custom URL of your choice. You can also select “expand on click” to scale the image with a lightbox effect.
Block Settings

Every block has specific options in the editor sidebar in addition to the options found in the block toolbar.
Alternative Text
To aid visitors using screen readers, every photo that adds meaning to the page should be given concise meaningful Alt Text. Alt Text should briefly convey the contextualized message of the photo. Ensuring the meaning of images is conveyed via Alt Text aligns with the Americans With Disabilities Act.
This phrase or sentence only needs to be a short phrase that conveys the message of the photo in its context. It should not duplicate nearby document text. Images that do not convey meaning and are purely decorative should be left blank. The W3C has produced a decision tree to help you decide if an image is truly and purely decorative or has meaning.
Exception: Linked images. If an image functions as a link, it must always include meaningful Alt Text, even if the image appears decorative. In this case, the Alt Text should clearly describe the destination or purpose of the link so that screen reader users understand what clicking the image will do. Avoid generic text like “click here” or “image link.” Instead, use descriptive phrases like “Read about our Summer Program” or “Download the Admissions Viewbook.”
Learn more about what you need to do to ensure your website’s accessibility on our Accessibility page.
Aspect Ratio
You can choose to display your image image at a different ratio than the one you uploaded. It will crop into your image to create the desired ratio.
Width/Height
You can also manually set your image’s pixel width and height. It is best practice to only set one value and let the other be “Auto”, otherwise you could squish your image.
Resolution
When you upload your image we go ahead and generate several additional sizes in case you’d like to avoid photo editing altogether. If you have taken the time to edit your photos, choose Full Size. If you uploaded a sufficiently large image but it still looks fuzzy, check to see if you aren’t using a smaller size than you intended. Also, if your image is smaller than one of the generated sizes the larger version won’t be created.
Thumbnail: 300px x 300px square
Medium: 600px on the long side
Large: 2000px on the long side
Full Size: Your original uploaded image