
Gallery
The gallery block allows you to easily add multiple photos and automatically arrange them attractively. You can control the number of columns and the size of the images. The gallery block can be added to a page by clicking on the Add Block button.


Detailed instructions on adding blocks can be found on Building a Page.
Block Toolbar
Each block has its own block-specific controls that allow you to manipulate the block right in the editor.
Three main options on the Gallery ToolBar
- Transform to / Change Block Type
- Change Alignment
- More Options.
You can transform or change the block to another block. or Create a group or change it to a block of columns. If you find that a gallery display of your images is not the right fit, you can change the block types to the Image block with the Transform button. Then every image from your gallery will be added as a single image block in your post.
Adding Images
When you add a gallery block, you’re given two options, Upload and Media Library.
Upload allows you to upload a new image or multiple images to the gallery block and your media library. While Media Library lets you select from previously uploaded images in your Media Library. You can also drag & drop multiple images at the same time from your explorer or finder window into the gallery block.
Removing images
You can remove images from your gallery after adding images by clicking the cancel icon. You can still add the image back later.
Moving Images
You can move images around in you Gallery, so you can set your images the way you want them to be set
Replace Images
You can replace images in your gallery with the edit/pen icon, this will allow you to upload or select another image from your library.
Caption Images
You can caption your images individually on the image. You can also caption the gallery
Block Settings
Every block has specific options in the editor sidebar in addition to the options found in the block toolbar. If you do not see the sidebar, simply click the ‘cog’ icon next to the Publish button.

Columns
You can choose how many columns your gallery block will have. You can select between 1 column and 8 columns.
You can only select as many columns as you have images, so if you add 4 images, you’ll be given the option for a maximum of 4 columns. This number will increase as you add more images until you reach the maximum of 8.
Your images will automatically arrange themselves to look good no matter how many columns you select. Try changing the setting and see what you like best!
Crop Images
You can select whether or not you’d like your images to be cropped in your gallery block. This option is useful if you have images of varying sizes and shapes. Cropping them will make the images in each row of the gallery the same size. Try it each way and see which setting looks better.
Link to
You have 3 options for linking the images in your gallery: Attachment Page, Media File, and None. This determines what happens when your visitors click on the images in your gallery.
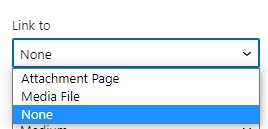
- Attachment Page
- This will lead anyone who clicks on your image to your site’s attachment page. This is an informational page about your image, which includes the image, the caption, the image description, and a comment field.
- Media File
- When a visitor clicks on the image, the image file will be displayed in the original size in a new browser window.
- None
- This makes your images un-clickable, so they don’t link to anything at all.
Image Sizes
The Image Size setting allows you to select from Thumbnail, Medium, Large and Full Size.
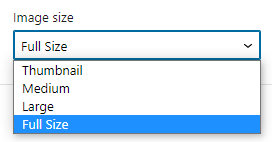
- Thumbnail: Displays a small thumbnail-sized version of your image on the page/post. Note, by default the Thumbnail size is a square, so some cropping of your original image may occur.
- Medium: Displays a medium-sized version of your image on the page/post. This is a good size to use with Left/Right alignments, as it leaves sufficient space for legible text to either side.
- Large: Displays a large-sized version of your image on the page/post. Note: WordPress will determine the width of the content column of your theme, and display the largest possible image for that space.
- Full Size: Displays a full-sized version of your image on the page/post. Note: WordPress will determine the width of the content column of your theme, and display the largest possible image for that space. If your original image is larger than this column width, the full size of the image may not be displayed.
Note: For these images sizes to apply your Theme needs to support those choices.
Expand on Click
This toggle in the editor panel will open the image into a lightbox when a user clicks it. It should load the Full Size version of your image.